The Precision hard turning counts in myonic in the machine tool warehouse business area on the most important production steps. The turning takes place directly to the final dimension with single-digit μ-tolerances. A Probe from Blum Novotest now measures important workpiece dimensions directly in the machine clamping. This increases the accuracy of the measurements, improves the manufacturing process and shortens the lead time.

Contents
The Myonic machine tool bearings are manufactured in a precisely air-conditioned hall in Leutkirch im Allgäu. "The high-precision roller bearings are used, for example, for rotary or swivel tables, milling heads or swivel spindles in machine tools", explains Christopher Sauter, Production manager for the manufacture of the Precision bearings.
 Calculate fit calculator easily online
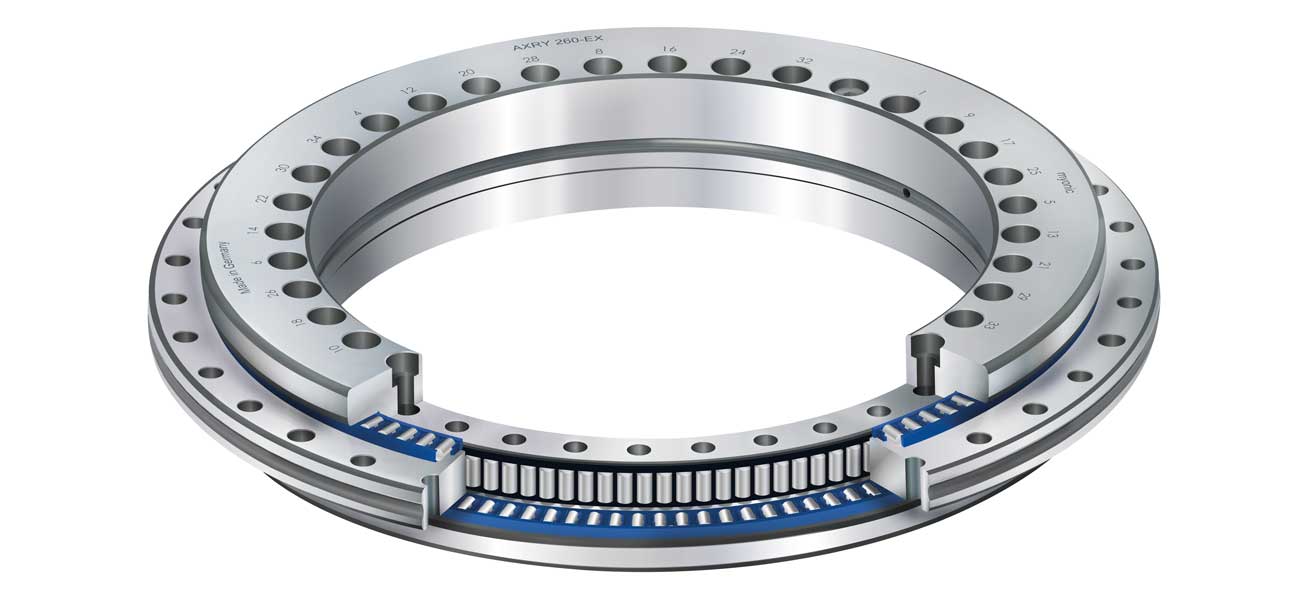
“These double-acting, screw-on and ready-to-install precision bearings form the Myonic model series AXRY warehouse. “The axial / radial bearings consist of an inner ring, outer ring and axial washer. In addition, there are the cylindrical rollers, axial and radial cages, lubricants and retaining screws that hold the mounted bearing together. The rings are made of chrome steel and are hard machined on turning centers.
The hard turning process takes place in two steps, roughing and finishing, on different machines. The fine finishing takes place to final dimensions with a single digit μ tolerance takes place in one setting. Further post-processing on a horizontal or vertical lathe is not necessary.
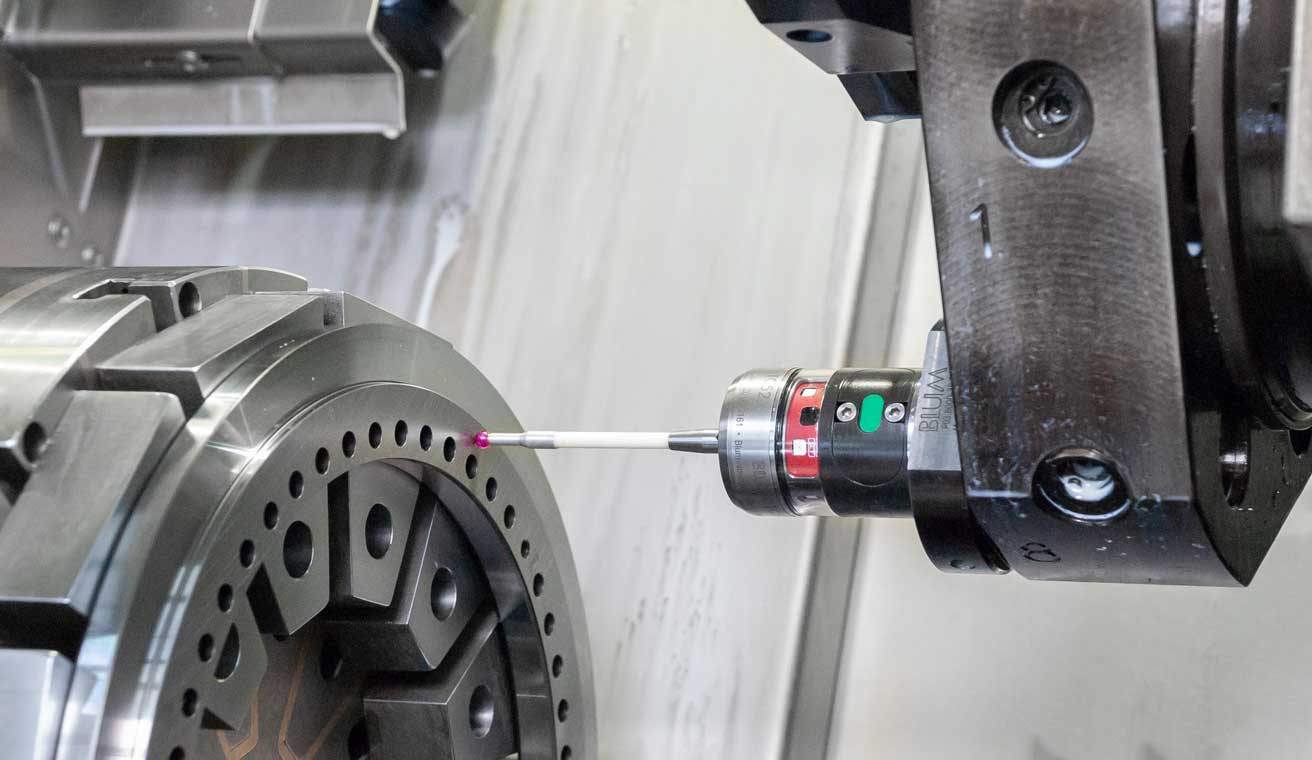
The Machining takes place wet with coolant. The workpieces are clamped on special magnetic chucks. Important dimensions that lie in the Z-direction are immediately set up with one located directly on the machine Measurement Technology determined. In addition, a new measuring probe now makes a significant contribution to improving the production processes.
This high-precision work is done by the touch probe TC52 from Blum. The probe then transmits the measured values to an infrared receiver in the engine room. The probe is brought into position on the Hembrug horizontal hard lathe using the tool turret.

It will be at every camp all important geometric features measured by means of probes. The measurements of the probes include steps, the width of the outer ring, inner diameter, outer diameter, all connection dimensions such as the bore where the customer places the bearing on his shaft pushes.
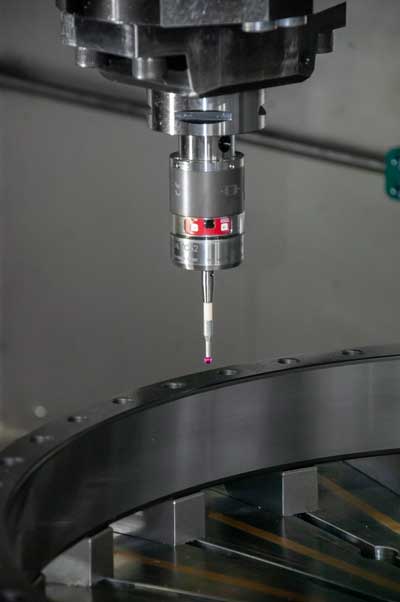
In addition to the general improvement of the manufacturing process, Leutkirch promised a more precise measurement thanks to the measuring probe. The measured values should be available during clamping in order to To keep the process stable and to receive the information promptly for any necessary adjustments. Initial tests with the TC52 touch probe met the expectations of all those involved and even exceeded them in some cases. This is because the steps and width of the bearing outer ring were measured partially automatically with the measuring probes directly in the clamping.
 “These are extremely important dimensions for Myonic: Here you have three tracks, one radial and two axial. If you imagine the Career as a cavity before, you want to know how big this is. Because its size is defined by the levels. When assembling the bearing, the employee knows which dimensions and which cylindrical roller diameters match in order to obtain the correct preload, ”says Christoph Sauter.
The change to the possible with the probe In-process solution led to more precise measurement results compared to manual measurement. The handling of the measuring objects was also an advantage. The AXRY bearings are available in sizes 50 mm, which weigh only a few kilograms, up to a bore diameter of 650 mm and a weight of almost 200 kg. With the latter, the handling effort in manual measurement was enormous. The larger the parts, the greater the advantage of in-process measurement. After the successful start with the Blum probe, Myonic also equipped the other lathes with the TC52 probes.
Improved measurement accuracy and higher Measuring point frequency make the Allgäu machine-builders very satisfied, after all, the measuring probe from Blum made it even more precise and now records more measuring points in a shorter time.
“This gives us a mating in the assembly process significantly higher security. Another advantage that should not be underestimated is the relief for employees, who now have more time for other work, ”summarizes Christoph Sauter. “Even if the process in the machine has been extended, the use of the measuring probe has reduced the overall throughput times. That is why we plan to use the Blum probe to measure the diameter directly on the machine. "
The TC52 infrared probe is suitable for small machining centers. It has optoelectronic signal generation, highest measuring speeds of up to 2 m / min and offers perfect, rotationally symmetrical probing behavior without a preferred direction.