Layer thickness measurement ensures quality in powder coating
- Details
- Hits: 10136
The GSO Surface Technology uses over 1000 different paints every year to coat components for a wide variety of industries. The trend is towards more individual products with smaller batches and frequent color changes. Automation and the early one Coating thickness measurement with the non-contact testing system Paintchecker mobile from optisense play a key role in maintaining the quality level and increasing productivity.

Content of the cover story
- Coatings from GSO surface technology
- Powder coating process in seven steps
- Calibration tailored to powder coating
Coatings from GSO surface technology
The typical orders of the Bavarian company come off Automobilesupplier industry, electrical industry, mechanical engineering or Medical Technology. They range from analysis equipment to huge aluminum steel press housings that need to be refined. Interesting applications for coatings can also be found in the consumer goods and furniture industries as well as in trade fair construction and shop fitting. "Our strength is the high quality of the coatings," says GSO managing director Horst Schuller his company in the market. "This is why continuous process optimization and quality control are playing an increasingly important role."
 Solidworks 2023 | CAD software by and for users
Numerous parameters such as the layer thickness affect the coating process. Until recently, the layer thickness measurement at GSO was carried out with a contact layer thickness measuring device, which could only be used after baking and cooling. However, there is a delay of between 30 minutes and several hours between the coating process and the detection of defective layers. Time and again, a tolerance deviation was recognized far too late and this resulted in disproportionately expensive rework or rejects.
Layer thickness measurement before baking
“That's why we looked for one Measurement Technologywith which the layer thickness can be measured and checked as early as possible in the process, ”explains Mr. Schuller. In order to determine the layer thickness in each of the three coating systems measure flexibly The technical business economist was looking for a mobile, non-contact, non-destructive coating thickness measuring device. It should be just as suitable for the large, automatic through-feed system as it is for one of the two smaller cabins.
GSO found out about the contactless system via the Optisense website Paint checker mobile attentive. “Sales specialist Jörg Mühleneisen demonstrated the device to us in production. Everything was just right, ”remembers Mr. Schuller. "The Paintchecker immediately convinced with correctly measured values."
Selection of the coating thickness measuring device
 After a comparison with different coating thickness measuring devices from other manufacturers, Optisense was quickly awarded the contract. The GSO was able to gain experience with a loaner device. “We measured the layer thickness on a wide variety of objects, from fittings and lampshades to motorcycle parts. The Paintchecker mobile really does an excellent job, ”said the managing director. The fast, precise and flexible layer thickness measuring system is almost universally applicable.
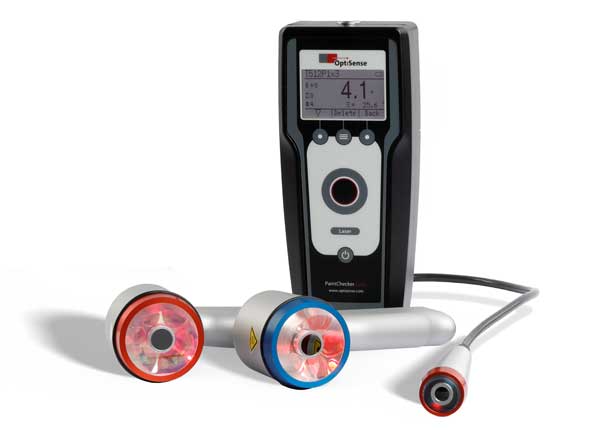
The Paintchecker mobile Gun-B was made for the non-contact testing of freshly applied powder coatings optimized before baking. It measures the still soft powder layers, regardless of color and type, on carrier materials such as Glass, Plastic, Metal or wood. The shrinkage during melting is also taken into account.
Powder coating process in seven steps
Step 1 incoming goods
In the incoming goods department, the delivered parts are checked for damage, e.g. B. by transport or corrosion randomly geprüft.
Step 2 preparation
The next check takes place in the preparation, where the Goods carriers hung .
Step 3 Fully automated pretreatment
In the fully automated pre-treatment of steel and aluminum with one Cross cycle 8 zone system is permanently checked. This means degreasing, pickling, phosphating, passivating or rinsing.
Step 4 drying the adhesive water
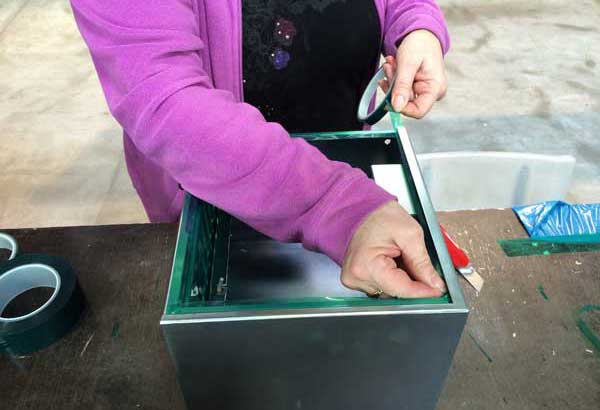
After the pretreatment, the adhesive water drying takes place fully automatically. The parts will checked again. Then employees select the parts in order to Mask areas or threads that are not to be coated.
Step 5 coating systems
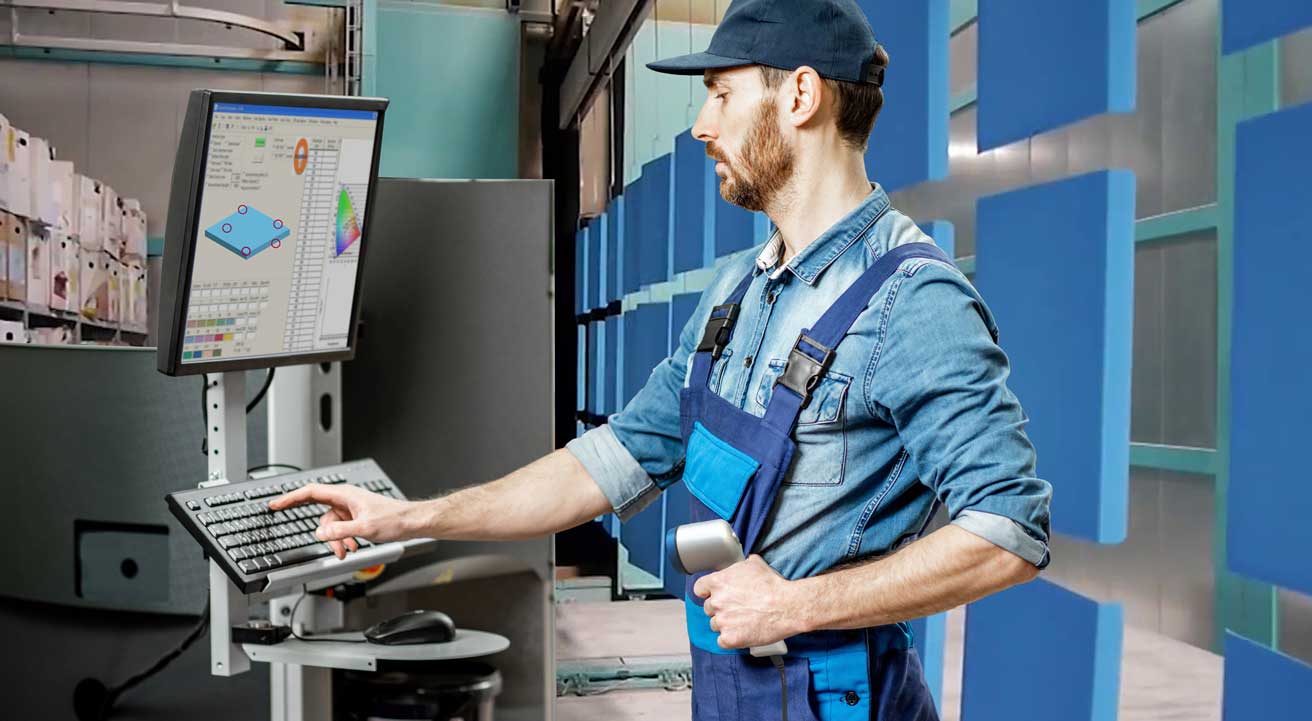
 Now the parts come in one of three coating plants. Eight guns coat the series products in the automatic through-feed system with powder recovery. Each workstation in the production hall is equipped with a PC. For recurring parts, parameters such as flow rate, amperage and speed of the conveyor belt are stored. The coater calls up these key figures and sets the system in a matter of seconds.
After the Fine adjustment the coating system controls the lifting devices with their guns independently through the intelligent part recognition. Large parts up to 7 m long pass through a large cabin. In the small parts booth, individual and sample parts are coated by hand during rapid color changes. The employee pre-coats the parts, which is particularly challenging for parts with corners, edges or angles.
After coating, the parts are suspended from a goods carrier and leave the cabin via a conveyor chain. At the exit, the layer thickness is measured directly after application. But at this point the coating is still soft and sensitive. Therefore, the Paintchecker mobile takes over the Process monitoring. The non-contact measurement is a prerequisite in order not to destroy the coating. The result of the measurement is checked with the lightweight, flexible hand-held device before the burn-in process. The system can be readjusted immediately to optimize the coating.
Optimization of the coatings
To do this, the coater calls up the order on the PC, to see the test requirements. “To do this, we define the parameters that are important for the respective product together with our customer before powder coating and check them in the various stages of the coating process. The measuring points for the layer thickness measurement are determined in advance. This can be eight or ten control points that are noted on a drawing and saved in the stored program. The maximum tolerances are also determined in advance. The measurement results can be recorded permanently in the test report for documentation purposes, "explains Mr. Schuller.
With the early measurements Save time-consuming reworkif z. B. the layer thickness is too thin. Schuller adds: "Our employee at the system can quickly and easily recoat by hand without having to turn the parts a second round for recoating and re-baking."
Step 6 Cross cycle curing oven
After coating, the workpieces move into the spacious cross-cycle stoving furnace. And further quality controls also come into play after the stoving. An employee is checking here by the line the layer thickness again after hardening.
Step 7 shipping
Finally, the orders are dispatched for the Delivery to the customer processed.
Calibration tailored to powder coating
The Paintchecker is ready to go because the calibrations especially for measuring powder coatings were developed. Thus, the measuring time, excitation pattern and excitation intensity are adjusted to the application ex works. Exact measurements are immediately possible. This calibration is suitable for all colors with layer thicknesses from 20 µm to 250 µm.
“We cover ours with the supplied calibrations 1000 different paints completely off. It doesn't matter whether the colors are dark or light - with the Paintchecker mobile we measure the thickness of the layers precisely and reproducibly, even on parts of complex shape with edges, corners or curved insides, ”explains the coating expert in conclusion.
